Introduction
ThingSpeak, an IoT (Internet of Things) analytics platform service, enables users to collect data, visualize, and analyze live streams in the cloud. MathWorks, the developers of MATLAB, launched ThingSpeak, offering a user-friendly interface and powerful tools for managing and analyzing data from IoT devices for students, professionals, and hobbyists.
- Data Collection: ThingSpeak allows users to send data from sensors and devices to the cloud. Data can be collected from various sources, including microcontrollers, single-board computers, and IoT devices.
- Real-time Data Visualization: Users can create real-time visualizations of their data using customizable charts. This feature helps in monitoring live data feeds and understanding trends at a glance.
- Data Storage: ThingSpeak offers secure data storage, enabling users to store historical data for future analysis and reporting.
- Data Analysis: With integrated MATLAB analytics, ThingSpeak provides advanced tools for processing and analyzing data. Users can write custom MATLAB code to perform complex data analysis directly on the ThingSpeak platform.
- Alerts and Notifications: Users can set up triggers to send alerts and notifications based on specific data conditions. This feature is useful for monitoring critical parameters and responding to changes in real-time.
Create Account on ThingSpeak
- Visit the ThingSpeak Website: Open your web browser and go to the ThingSpeak website (https://thingspeak.com).
- Create a New Account or Log In:
- Click on the “Sign Up” button to create a new account. Fill in the required details and follow the instructions to complete the registration process.
- If you already have an account, click on the “Log In” button and enter your credentials to access your account.
- Navigate to Channels:
- Once logged in, look at the menu bar at the right top of the page. Click on “Channels.”
- From the dropdown menu, select “My Channels.” This will take you to a page where you can manage your channels.
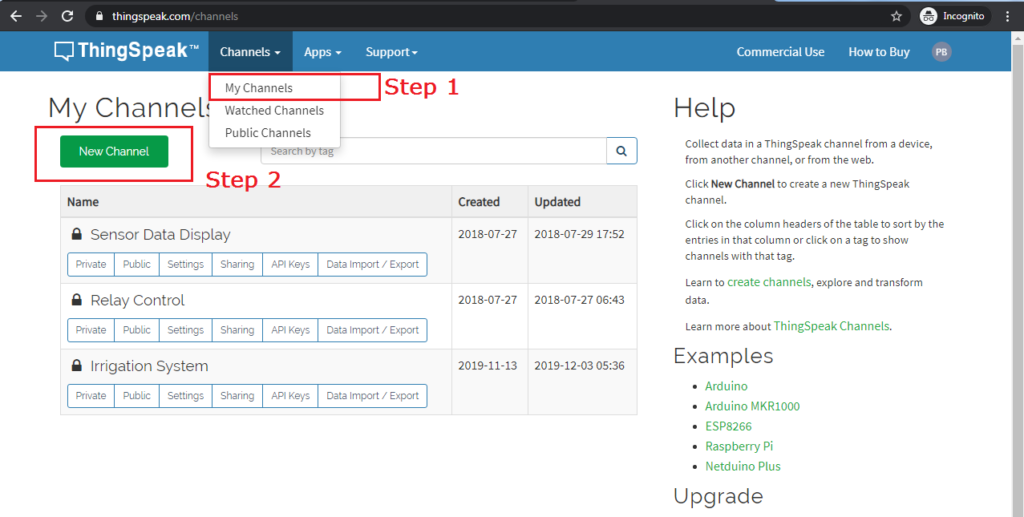
- Create a New Channel:
- On the “My Channels” page, click on the “New Channel” button. This will redirect you to a new page where you can set up your channel.
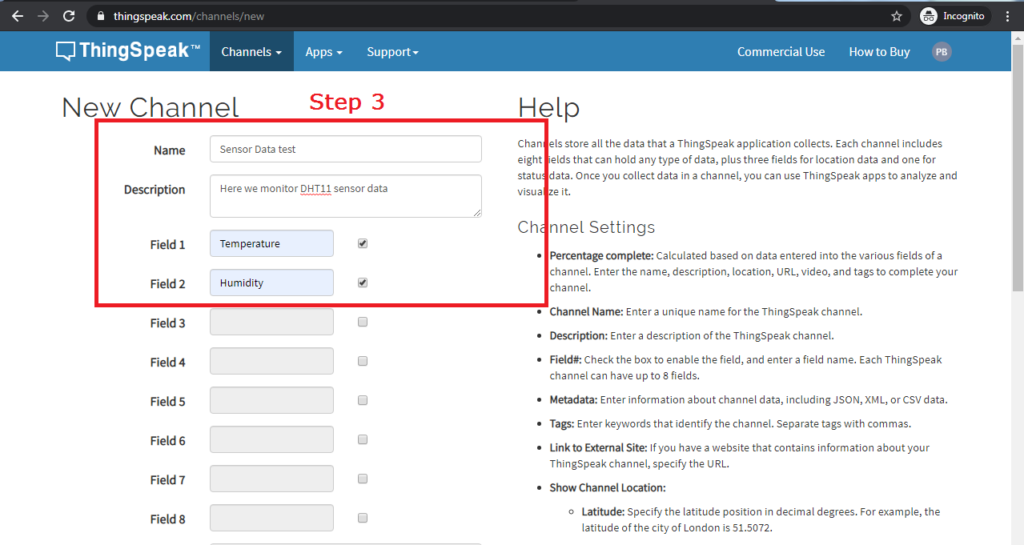
- Configure Your New Channel:
- Channel Name: Enter a name for your channel. This should be descriptive and relevant to the data you plan to collect.
- Channel Description: Provide a brief description of what the channel is for or what kind of data it will collect.
- Field Labels: ThingSpeak channels can have up to eight fields. Each field represents a data stream. Enter labels for the fields you plan to use (e.g., Temperature, Humidity, etc.).
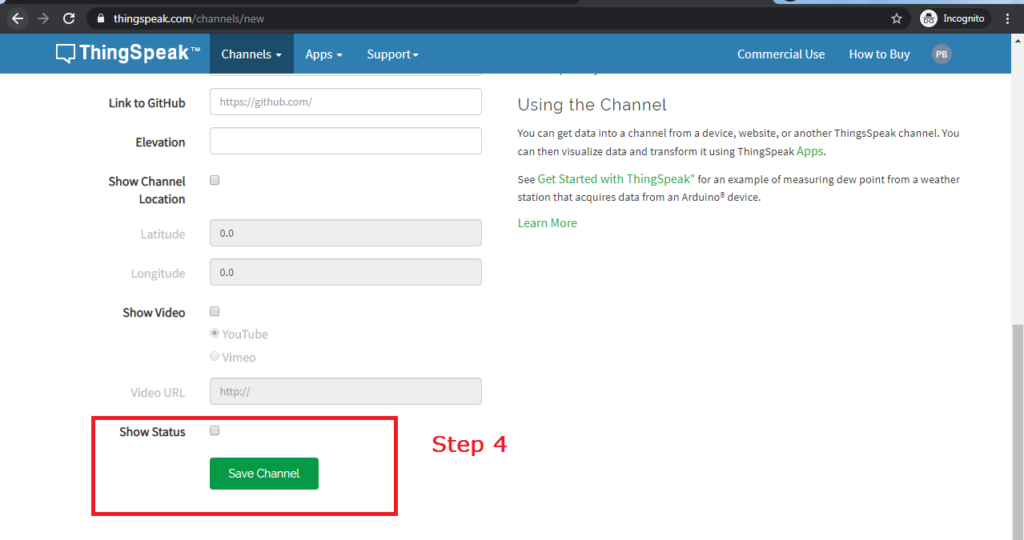
- Other Settings: Configure additional settings as needed, such as enabling public view, setting up metadata, or adding tags for easier identification.
- Save Your Channel:
- After filling in all the necessary details, click the “Save Channel” button at the bottom of the page to create your new channel.
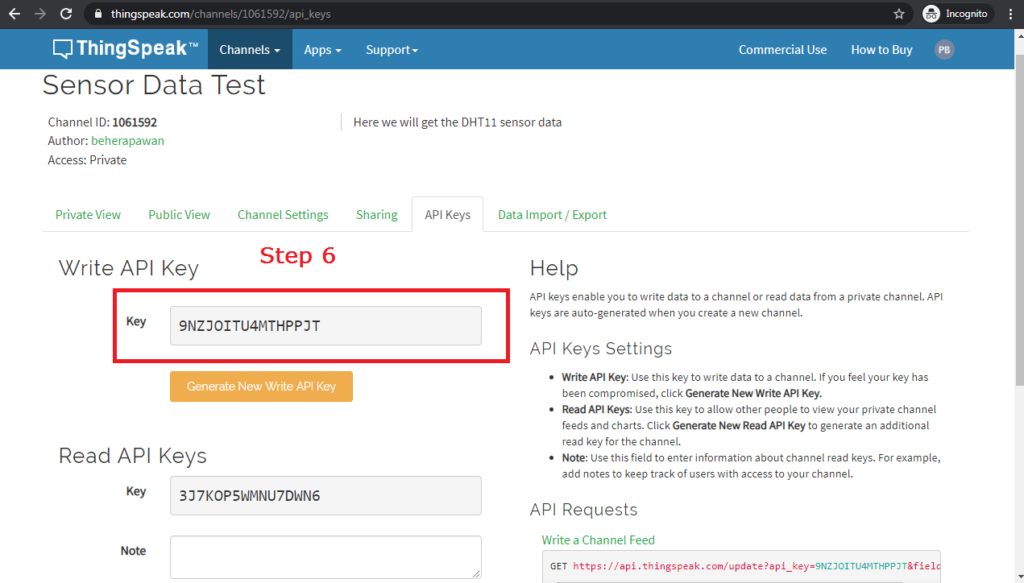
- Now we can recieve data and display it. You will be provided with a unique channel ID and API keys, which you will use to send data to ThingSpeak.

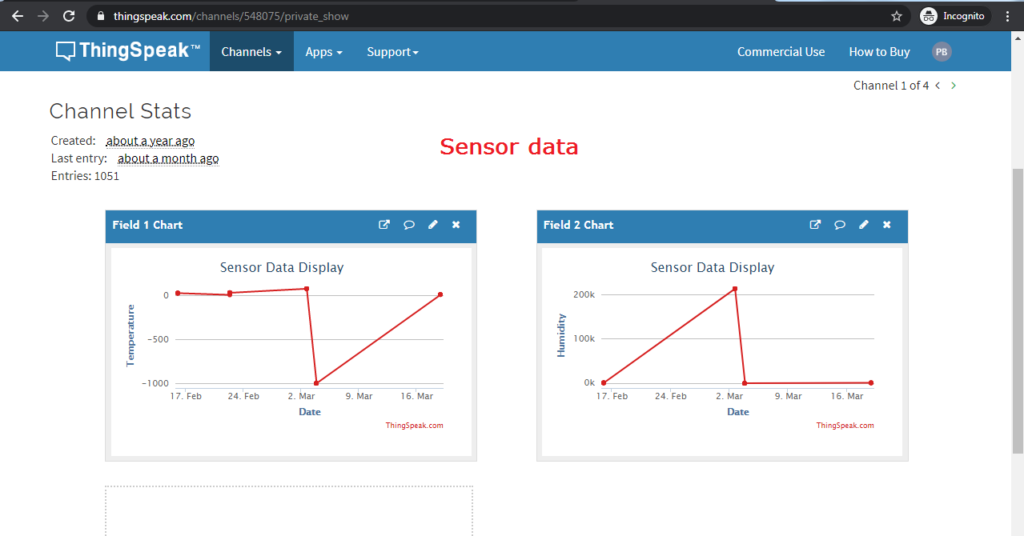
New Channel with Sensor Data
Once you set up your channel, you can begin sending data to it from ESP or other microcontroller. ThingSpeak provides API keys that authenticate your device’s data submissions. You can use HTTP requests or MQTT to send data from your devices to the ThingSpeak server.
Summary
Setting up a new channel on ThingSpeak involves creating an account, navigating to the “My Channels” section, and configuring a new channel. This process allows you to start collecting and analyzing sensor data from ESP/Arduino or any other IoT devices quickly.
Pingback: How to send Sensor Data to ThingSpeak Server Using ESP – Projects4u
Pingback: How to Interface Thermal Printer with Arduino UNO - Projects4u
Pingback: How to Interface Membrane Matrix Keypad Using Arduino Uno with Example Project - Projects4u
Pingback: Home Automation Project Using Raspberry Pi Pico Bluetooth - Projects4u
Pingback: Smart Digital Notice Board with NodeMCU ESP8266 - Projects4u